RS485 is a popular industrial standard for serial communications. The Industruino IND.I/O has an RS485 port connected to the 'Serial' hardware serial (D0/D1).
Note that RS485 is half-duplex, so we cannot send and receive at the same time. We need to use a TxEnablePin to switch between sending and receiving. This pin is connected to D9 on our MCU.
We can use RS485 to communicated between 2 IND.I/Os: we simply have to connect 2 wires for the RS485: A to A, and B to B as in this example.
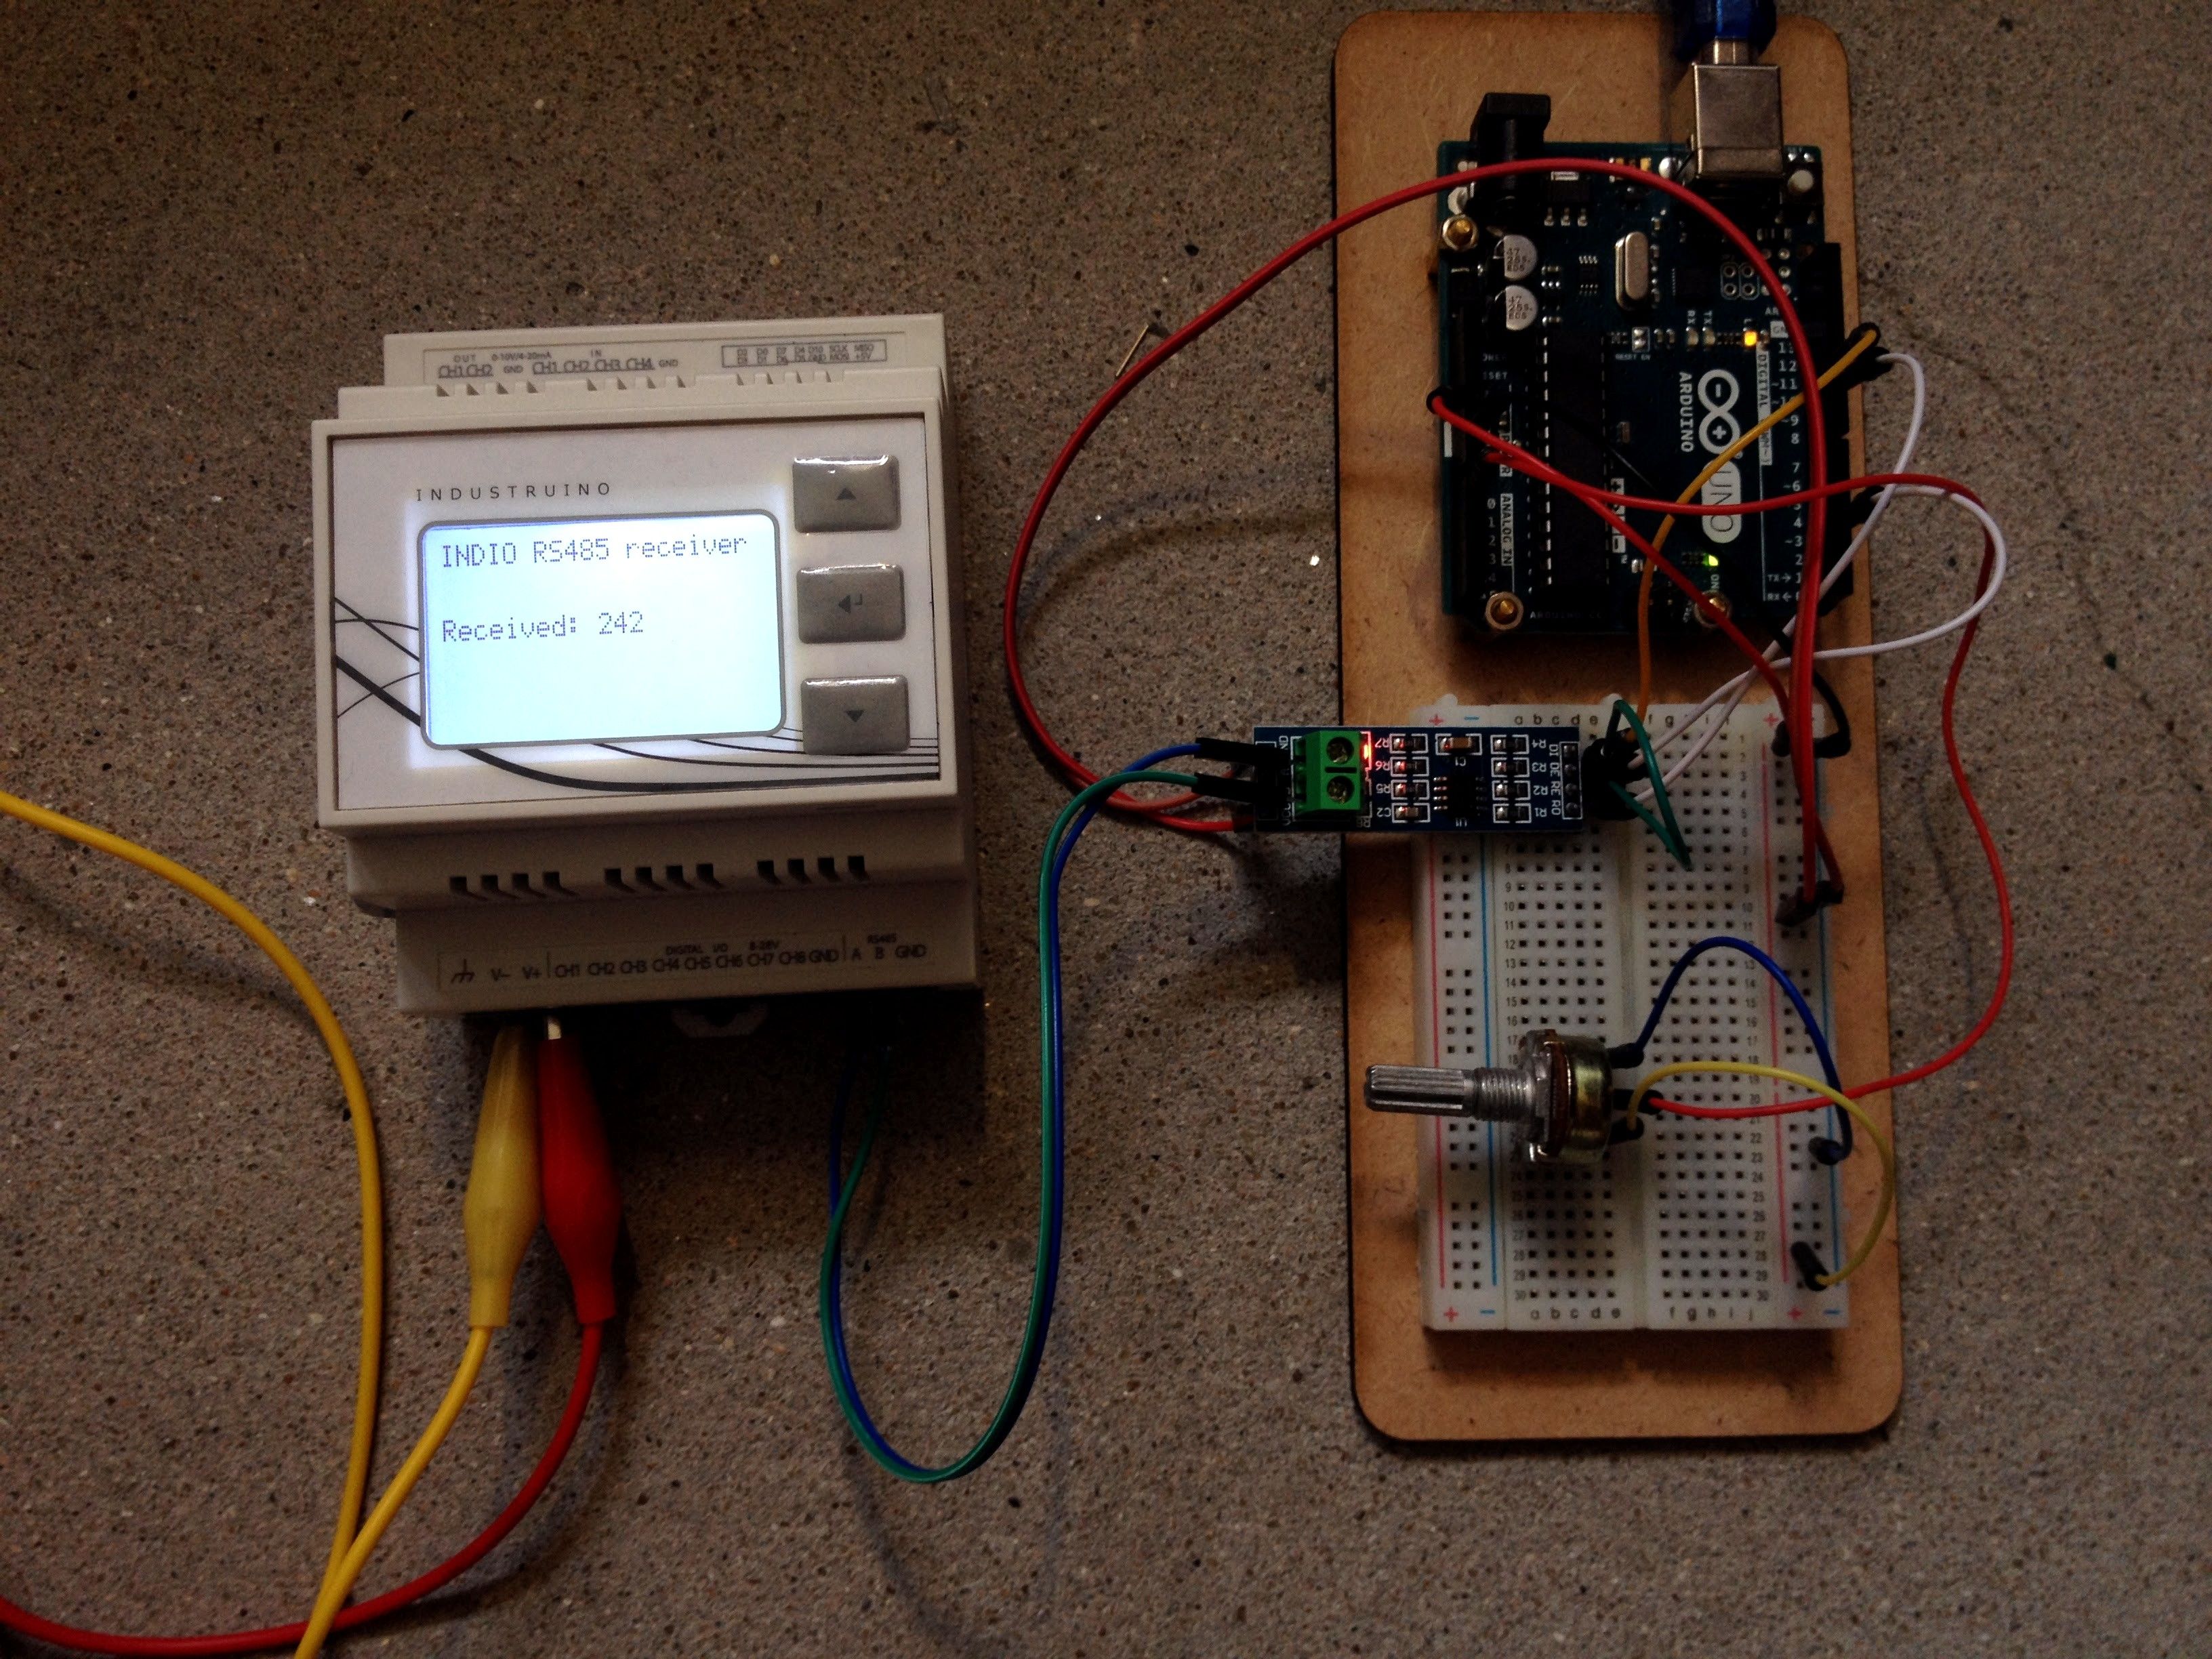
In the same way, we can also communicate with any Arduino, using a common RS485-to-Serial converter on the Arduino side, as we will describe here.
Notes on the below Industruino code:
- the TxEnablePin is D9
- the serial's name is 'Serial' (on the current D21G boards; on the older 32u4/1286 boards it was 'Serial1')
- it waits for input on Serial
- in case you want to use the Serial Monitor, use 'SerialUSB'
Notes on the Arduino code:
- this sketch uses a software serial (D10/D11), so that you can still use the hardware serial for the Serial Monitor
- it reads the value of analog input A0, and divides it by 4 for the range 0-255
- it writes this byte to the software serial
For more complex data exchanges, we recommend the Modbus RTU protocol, as in this example.
INDIO sketch (tested with D21G)
/*
 * Industruino INDIO RS485 serial demo   RECEIVER
 * INDIO has a half duplex RS485 port connected to hardware Serial
 * TxEnablePin is D9
 */

#include <UC1701.h>
static UC1701 lcd;

const int TxEnablePin = 9;
byte byte_received;

void setup() {
  pinMode(26, OUTPUT);
  digitalWrite(26, HIGH);   // LCD backlight
  lcd.begin();

  Serial.begin(9600);
  pinMode(TxEnablePin, OUTPUT);
  digitalWrite(TxEnablePin, LOW);

  lcd.clear();
  lcd.print("INDIO RS485 receiver");
  lcd.setCursor(0, 3);
  lcd.print("Received:");

}

void loop() {

  if (Serial.available()) {
    byte_received = Serial.read();
    lcd.setCursor(60,3);
    lcd.print(byte_received);
    lcd.print("  ");
  }

}
ARDUINO sketch (tested with Arduino UNO)
/*
 * Industruino INDIO RS485 example communication with Arduino over RS485
 * this sketch is for the Arduino: it sends the value of a potentiometer as a byte over RS485
 * more info on RS485 for Arduino at https://arduino-info.wikispaces.com/SoftwareSerialRS485Example
 */

#include <SoftwareSerial.h>
#define SSerialRX        10  //Serial Receive pin
#define SSerialTX        11  //Serial Transmit pin

#define SSerialTxControl 3   //RS485 Direction control
#define RS485Transmit    HIGH
#define RS485Receive     LOW

SoftwareSerial RS485Serial(SSerialRX, SSerialTX); // RX, TX

int byteSend;

void setup()  {
  pinMode(SSerialTxControl, OUTPUT);
  digitalWrite(SSerialTxControl, RS485Receive);  // Init Transceiver
  RS485Serial.begin(9600);   // set the data rate
}

void loop() {
    digitalWrite(SSerialTxControl, RS485Transmit);
    RS485Serial.write(analogRead(A0)/4); // Send pot reading
    delay(10);
    digitalWrite(SSerialTxControl, RS485Receive);  // Disable RS485 Transmit
    delay(100);
}