- Products
- Industruino
- Industruino 4-20mA.ker
Industruino 4-20mA.ker
/shop/product/industruino-4-20ma-ker-89
30-day money-back guarantee
Shipping from Belgium or HK
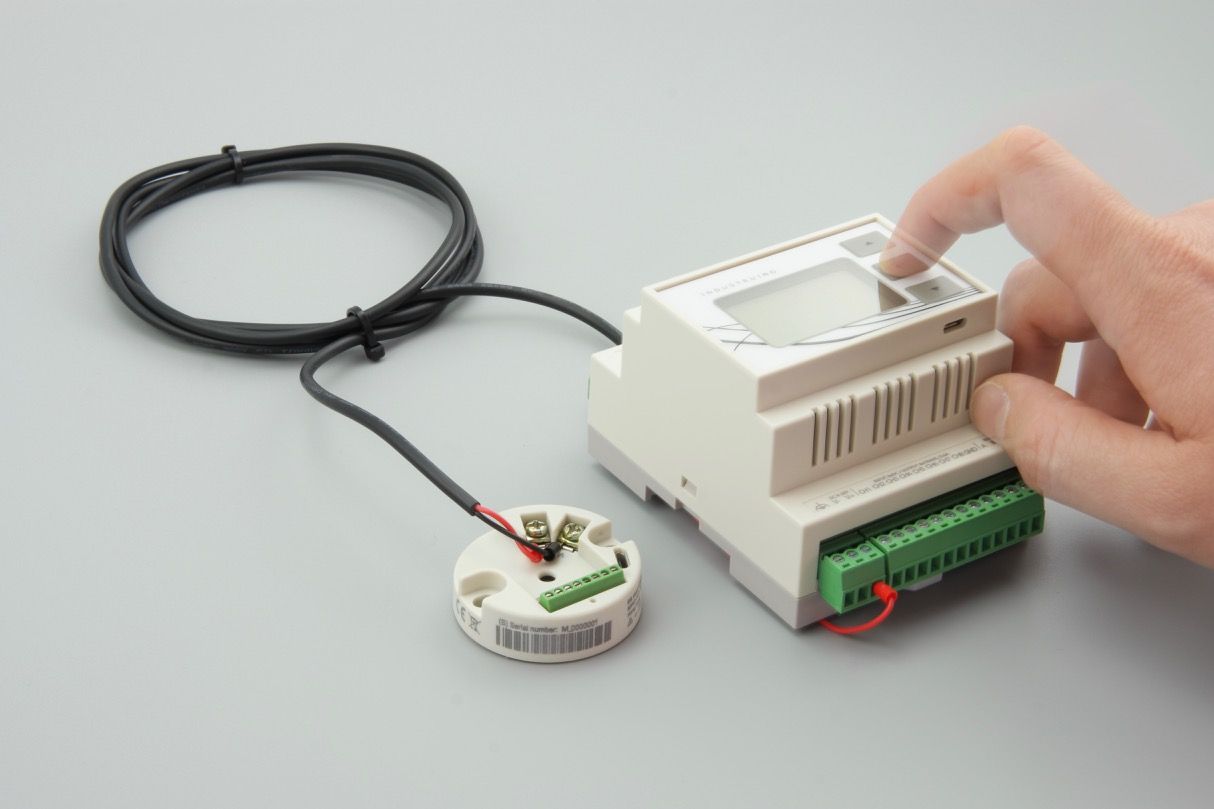
Universal 4-20mA sensor transmitter
Take an Arduino compatible 3.3V sensor and turn it into a long distance robust industrial sensor.
Description
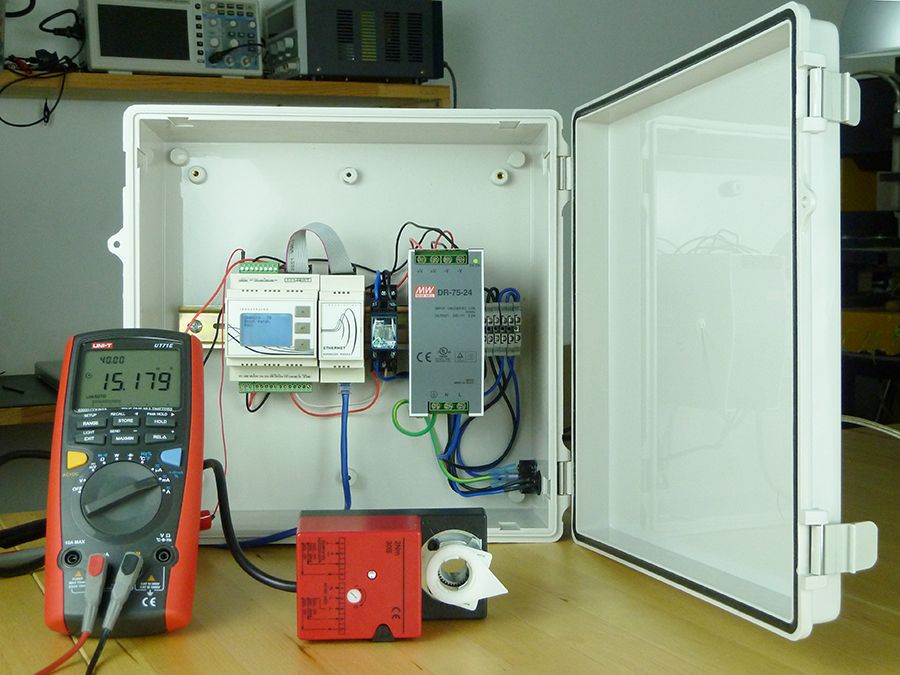
The 4-20mA.ker is a universal Arduino derived 4-20mA sensor transmitter. It allows you to install 3.3V sensors in remote locations over a single pair of wires. This is achieved by transferring power to the sensor and data back to the receiver using a 4-20mA current loop.
What's in the box
- 4-20mA.ker
- M4 mounting screws
- Quick-start guide
Weight (kg): 0.05
Tariff no: 90268020
Product Features
- 4-20mA signalling controlled by on-board 12 bit DAC
- Loop powered (12-32 Vin)
- Ultra low power microcontroller
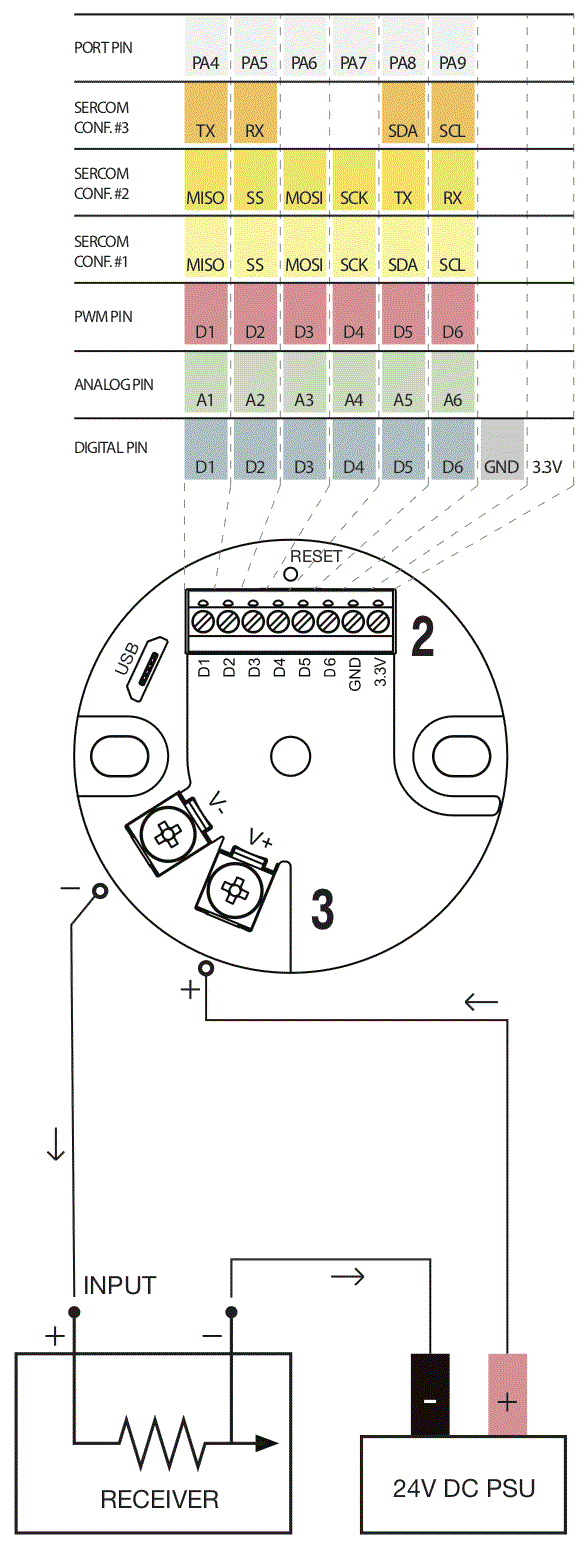
- 6 GPIO for sensor (supports 2 SERCOM, 6 ADC, 1 DAC).
- I2C / SPI / UART (any combination of 2 usable at the same time)
- 3.3V / 15mA supply for sensor (@24V supply, 500 Ohm receiver input impedance)
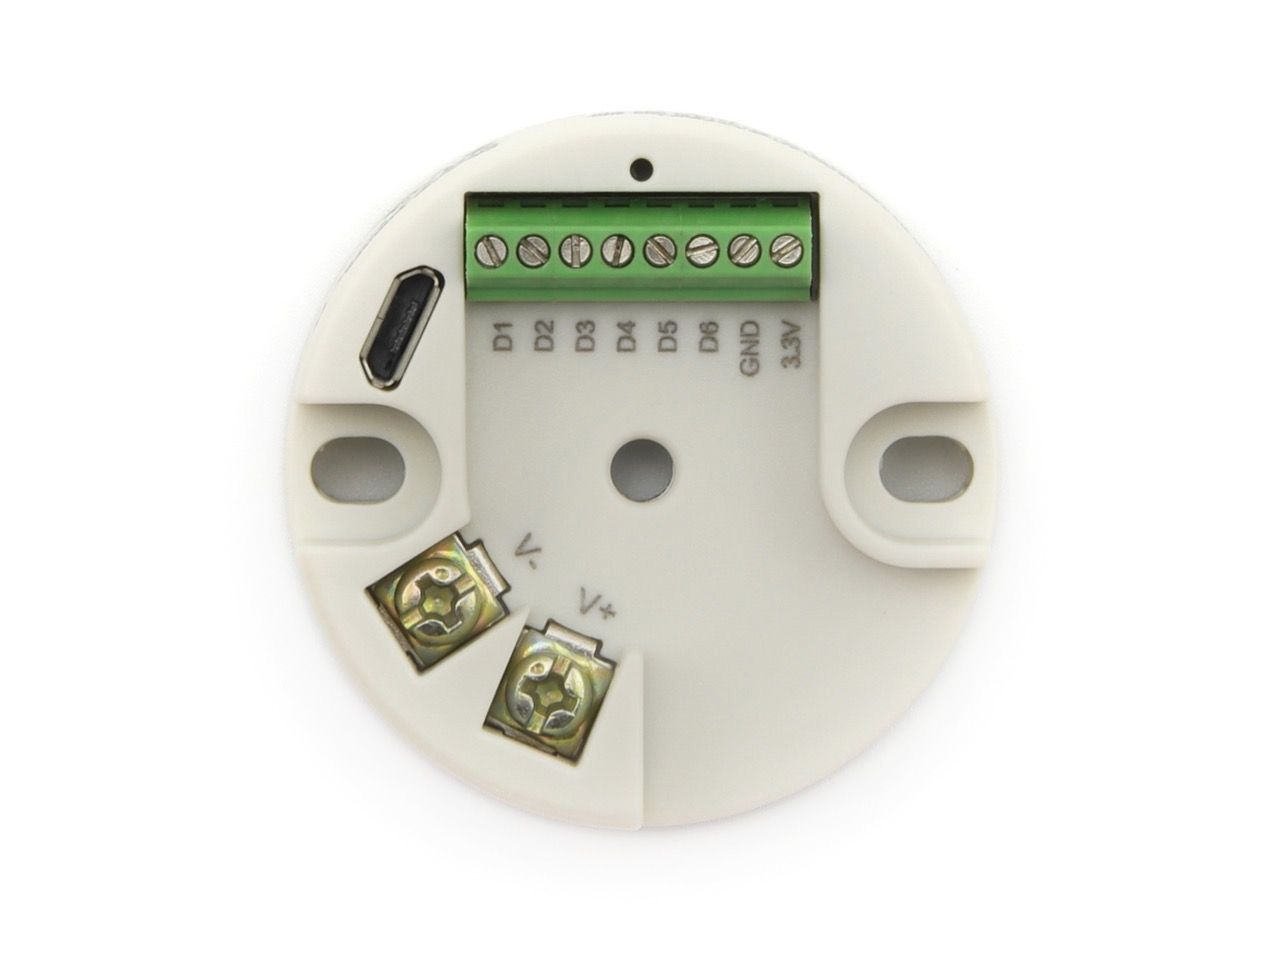
- All I/O and power available through screw connectors
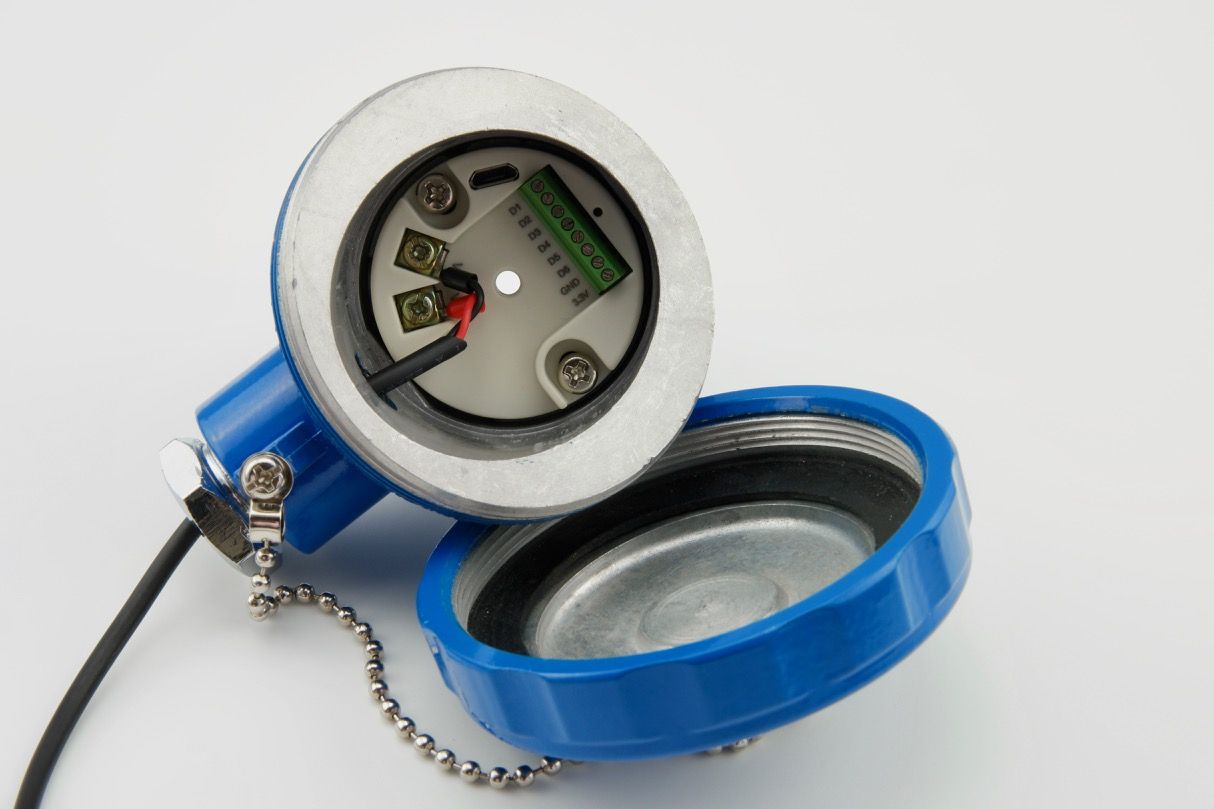
- DIN Form B connection head mountable
- Code examples available for download on our github
- Programmable with the Arduino IDE
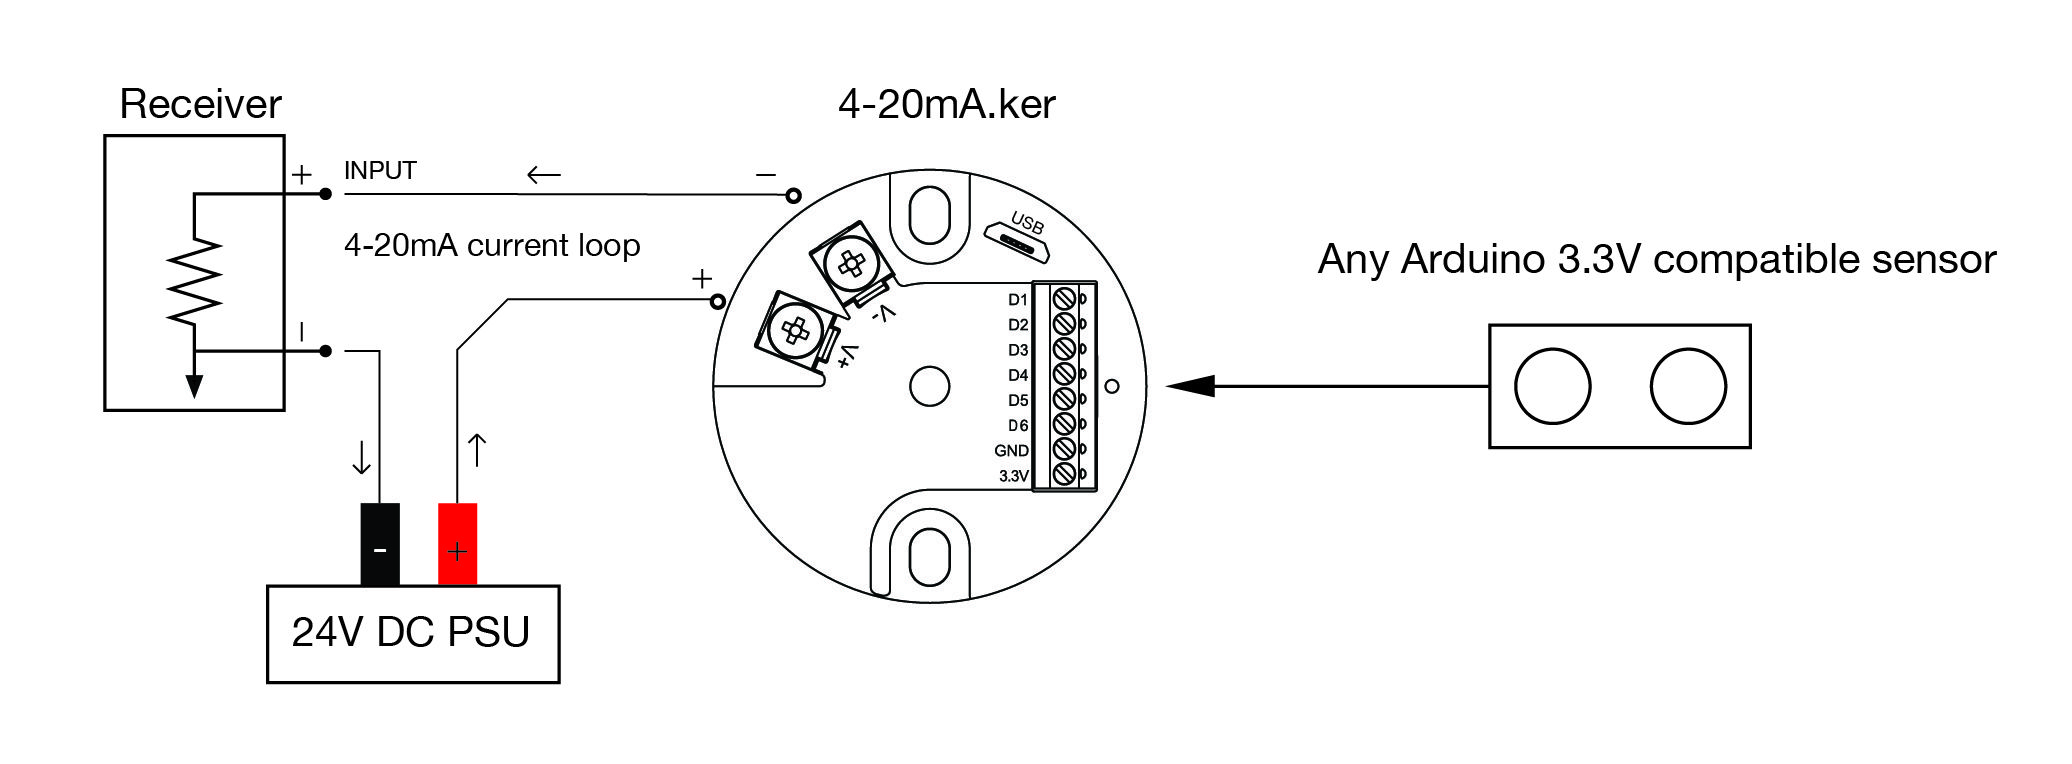
Loop section
- Connection scheme 2-wire (MCU and sensor powered from loop)
- Loop voltage 12-32V (24V nominal)
- Controllable loop current 3.8-20.7 mA (depending on voltage, loop resistance and sensor load)
- DAC resolution 12 bit
- Maximum loop resistance 700 Ohm (depending voltage and sensor load)
MCU section
- MCU Type: ATSAML21E18B (low power Arduino Zero/MKR equiv)
- Flash Memory 256 KB
- SRAM 32 KB
- Clock Speed 48 MHz
- MCU Operating Voltage 3.3V / 2.8V (jumper selectable)
- Micro-USB programming port
Screw connectors
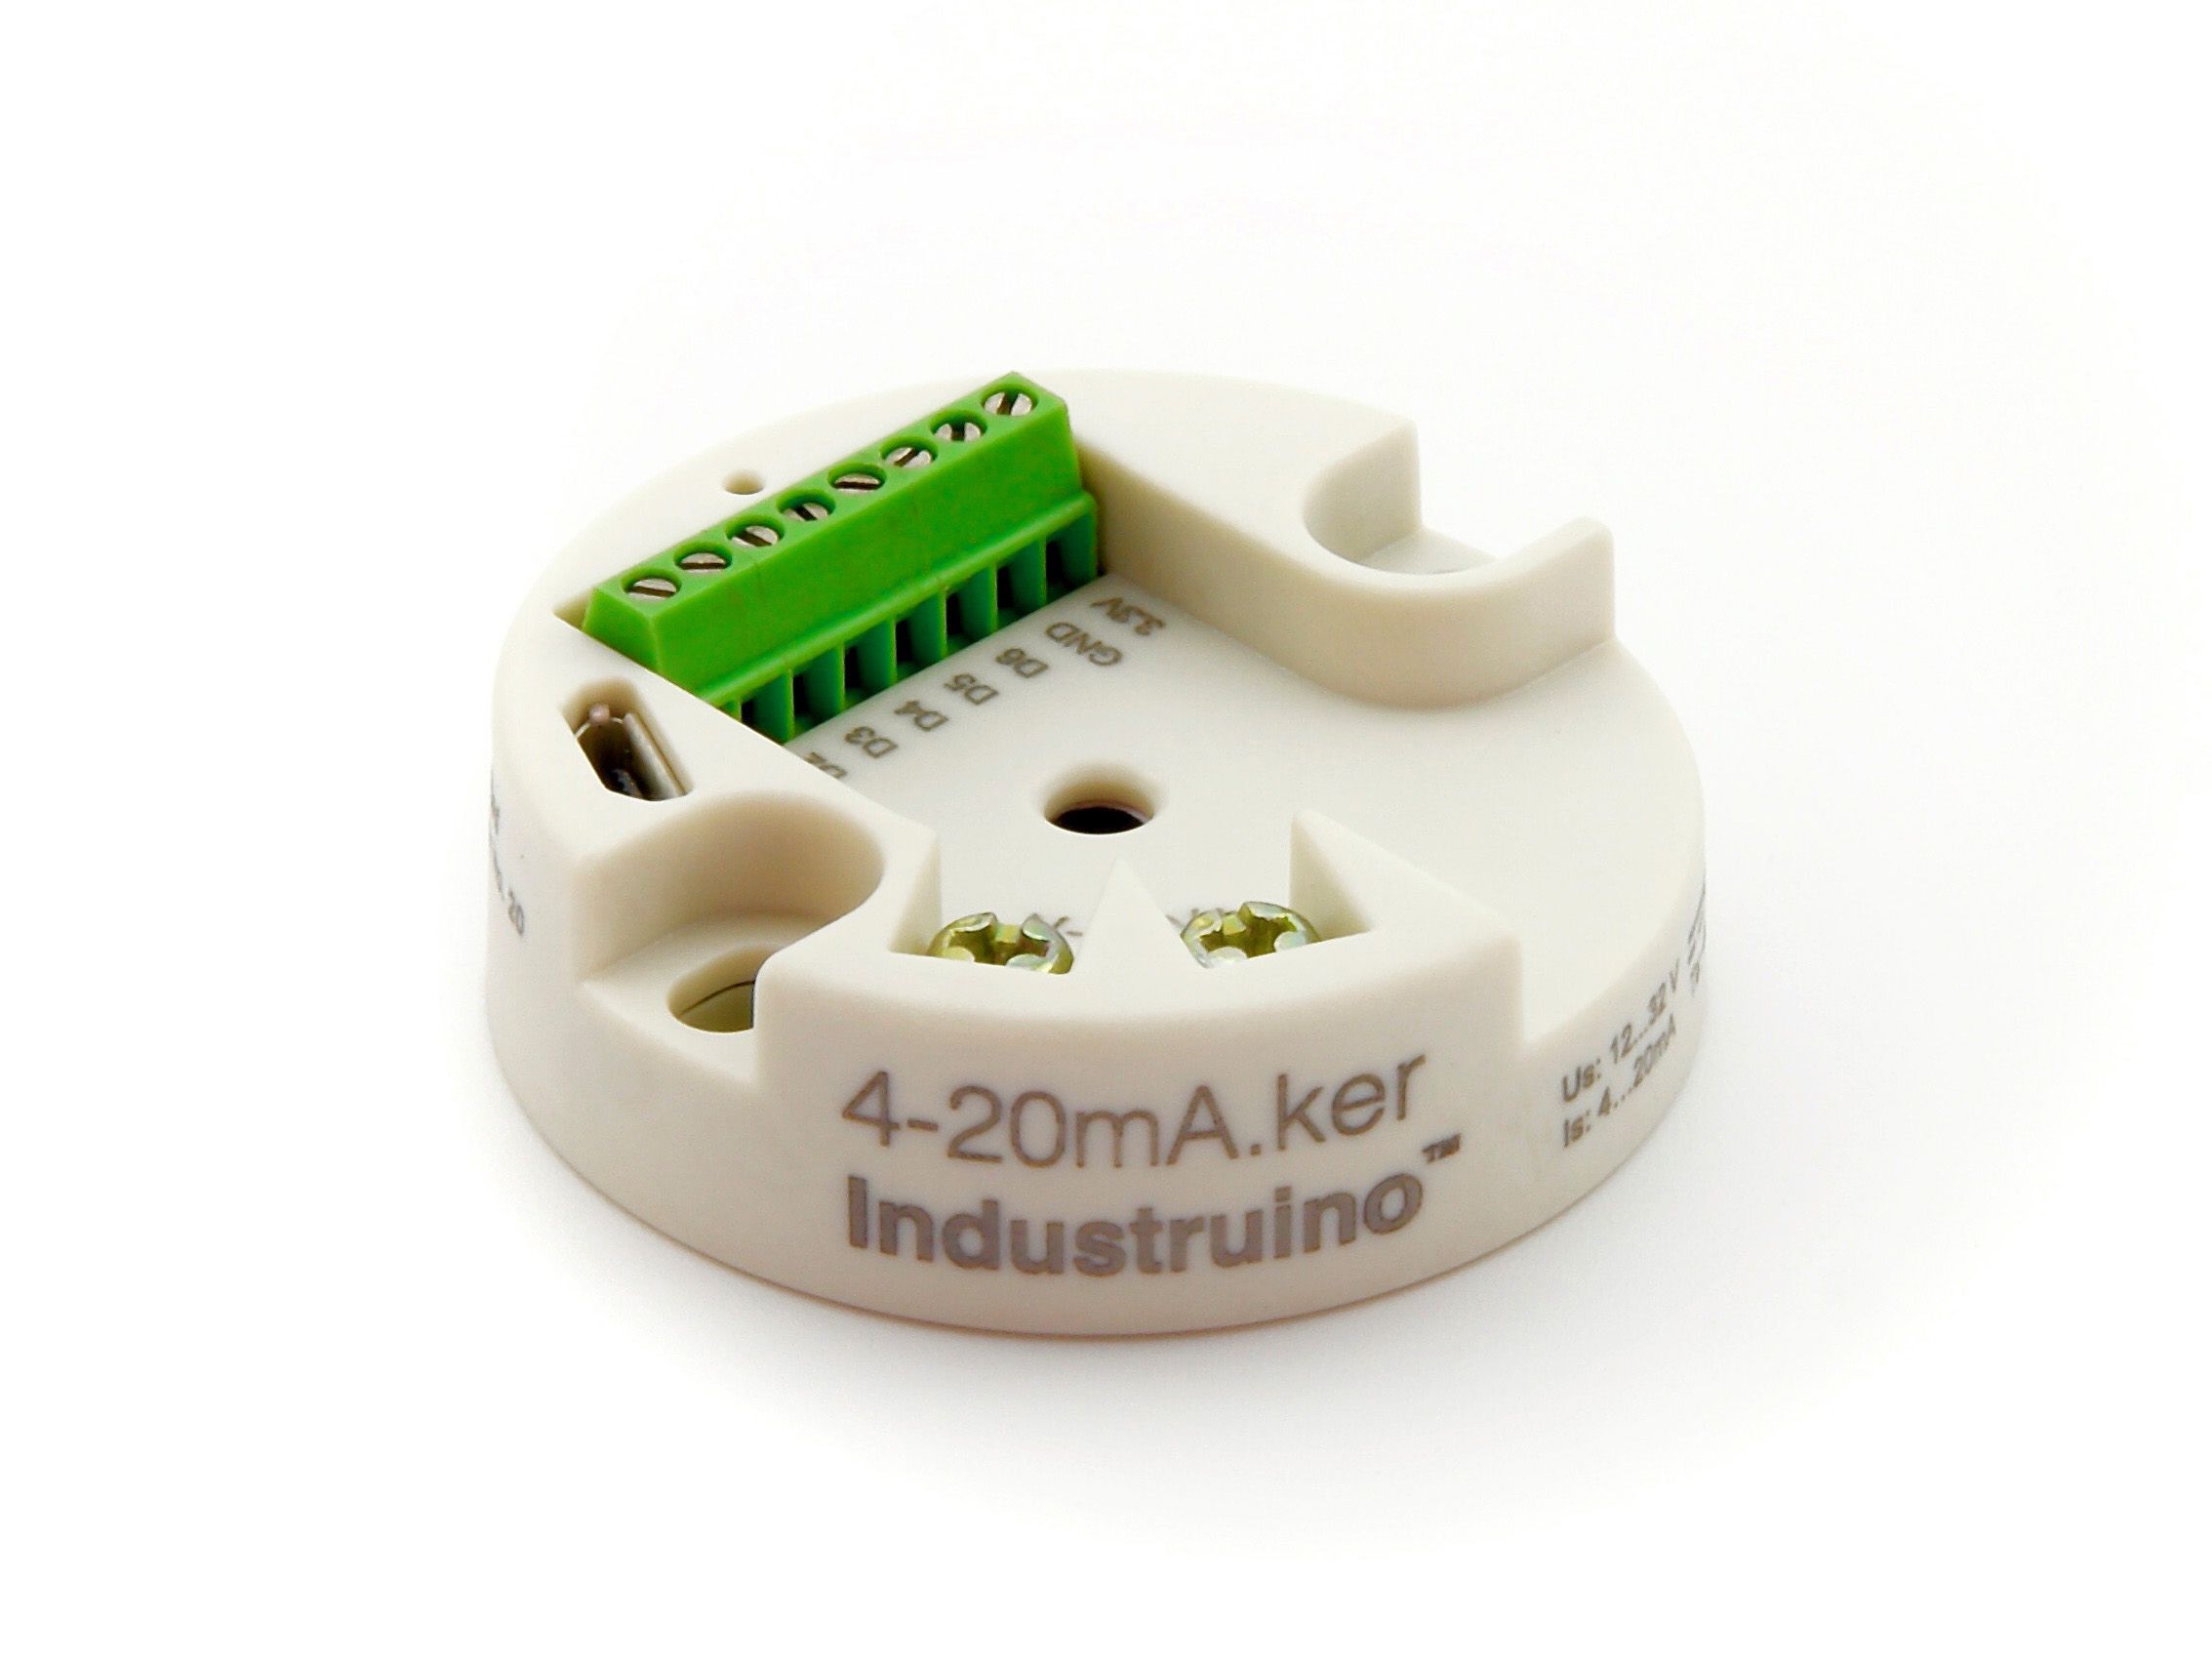
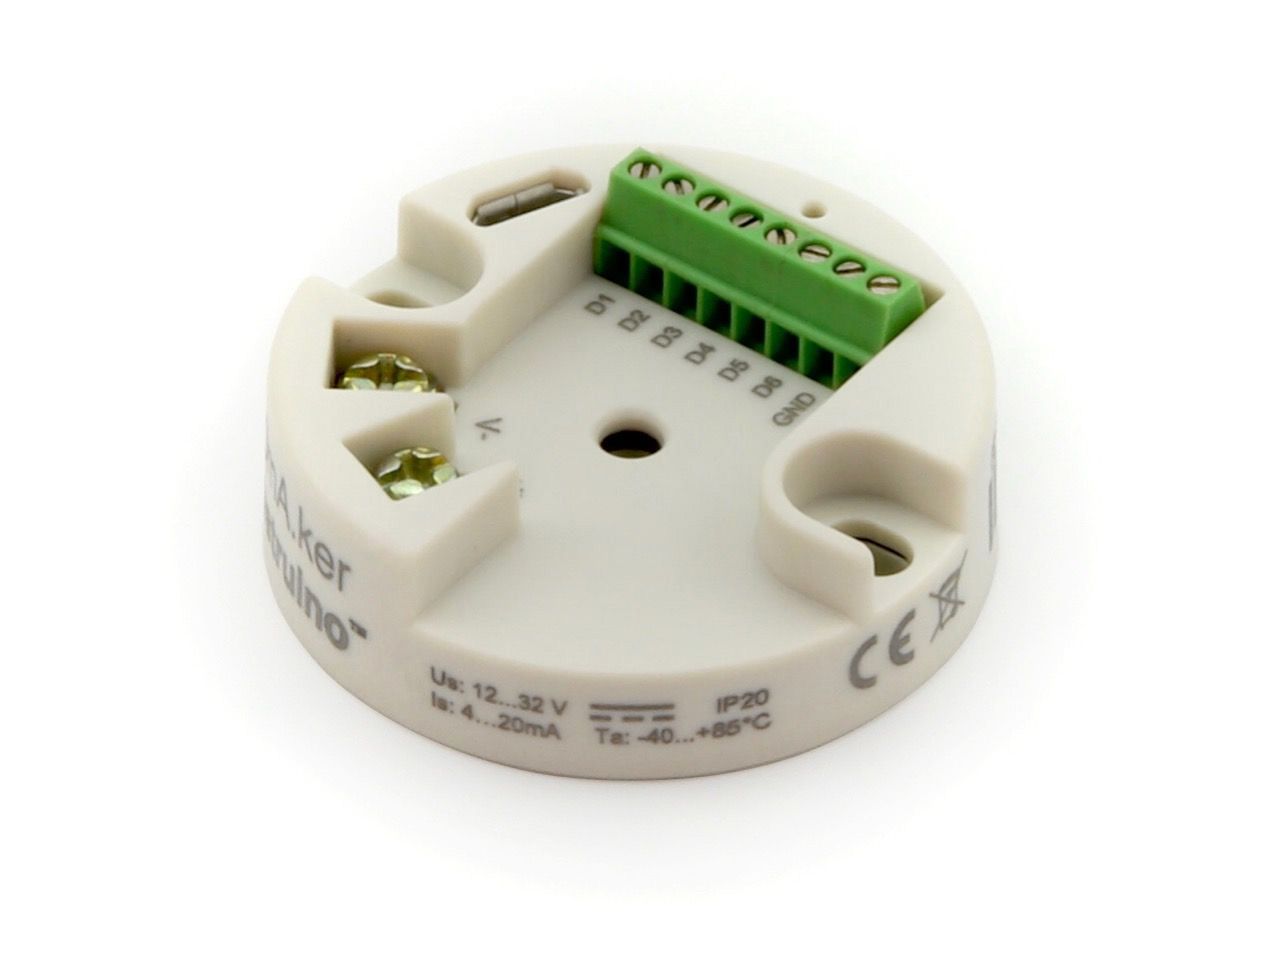
The two wire 4-20mA loop is connected to a pair of sturdy M3 screw terminals. The 3.3V sensor is connector to the MCU via an 8-pin 2.54mm screw connector.
Resilient enclosure
This custom engineered enclosure is injection moulded in high quality flame retardant PA66 polyamide. It can withstand high temperature operation, has high mechanical strength and chemical resistance.
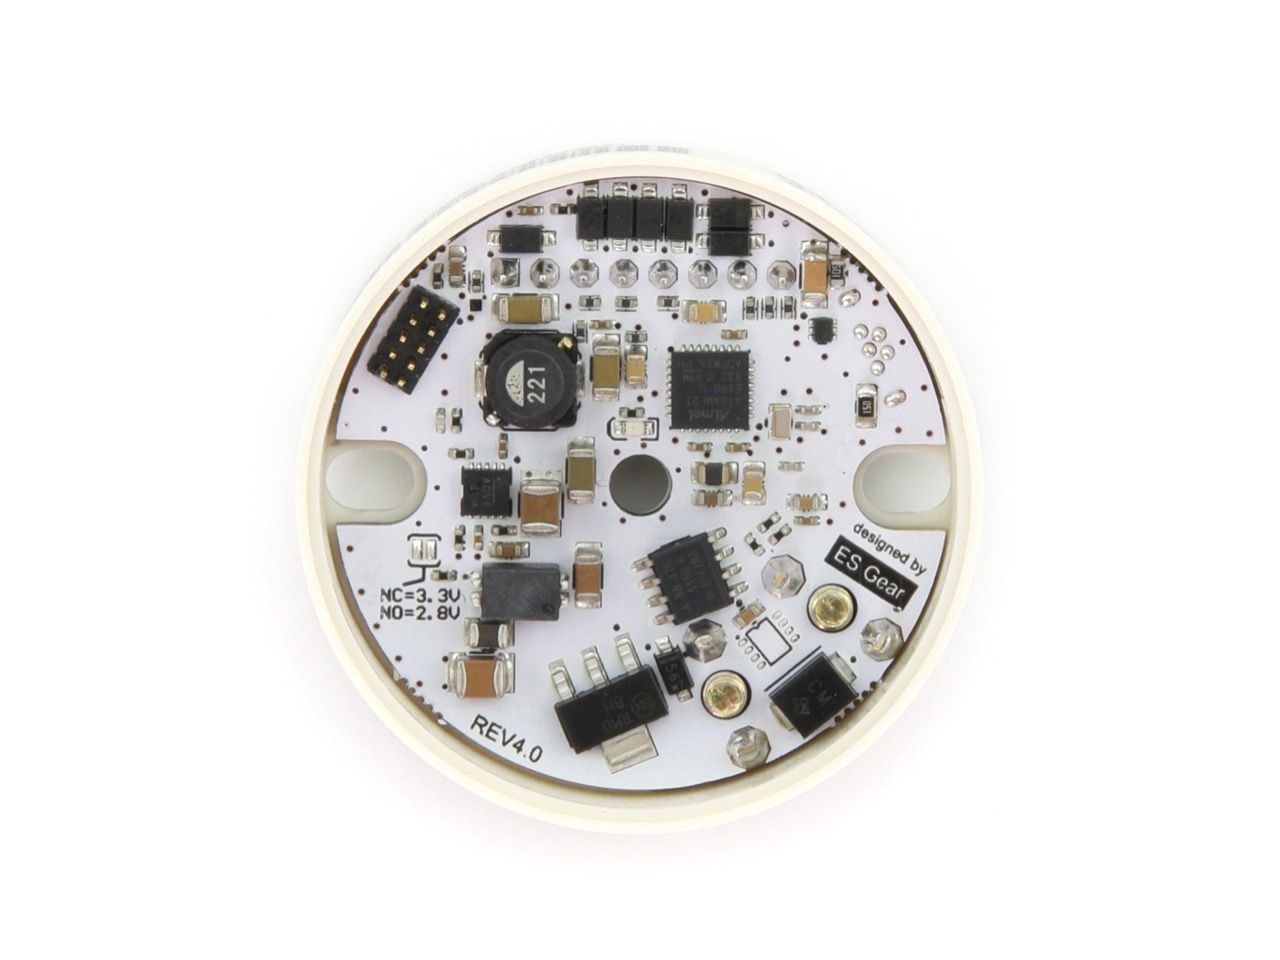
Low power industrial electronics
A highly efficient power supply and MCU design ensure that the absolute maximum power is available for the user's own 3.3V sensor. Plenty of filtering and protection are implemented to exceed EMC requirements and ensure a long life of the sensor and transmitter.
Programming the 4-20mA.ker transmitter
How easy is it to write code for my specific sensor?
const int analogInPin = 1;  // Analog input pin that the 3.3V sensor is attached to
int sensorValue = 0;        // value read from the sensor
int outputValue = 0;        // Output value for the DAC
const int dacPin = PIN_DAC0; //4-20mA loop DAC pin

void setup() {
    analogWriteResolution(12); //set DAC resolution for 4-20mA loop (12bit 0-4095 = 3.8-20.7mA)
    analogReadResolution(10); //set ADC resolution for sensor
}

void loop() {

  sensorValue = analogRead(analogInPin); // read the sensor
  outputValue = map(sensorValue, 0, 1023, 0, 4095); //map sensor value to optimal scale for output
  analogWrite(dacPin, outputValue);  // write scaled value to the 4-20mA loop
  delay(2);
}
Most sensors can be up and running in less than 5 minutes
Harnessing the power of the Arduino community you are most likely to find a ready working library for your specific sensor online which outputs the sensor value to the Serial terminal. To have this sensor data output via the 4-20mA loop you can use the simple map() function in the Arduino IDE to scale the sensor date over the full 4-20mA range. Then simply write the scaled value to the on-board DAC and you have just made a 4-20mA sensor!
Caution
- To achieve the minimum 4mA on the loop, the 3.3V sensor should not consume more than 15mA averaged (The transmitter has significant capacitance on the sensor supply rail, so short higher current peaks can absorbed, depending on the duration and interval). Higher average current is supported and will not damage the transmitter, it will only raise the minumum controllable loop current above 4mA, thus reducing your range and resolution.
- Due to the non-isolated nature of the transmitter we recommend that you use a USB isolator for programming and calibration via the USB port.
Downloads
Industruino 4-20mA.ker support files
The Industruino 4-20mA.ker board definition and driver files can be downloaded here