nRF24L01+
To illustrate the use of the expansion port, we will connect the popular nRF24L01+ radio transceiver to an Industruino, using the hardware SPI for communication.
The 14-pin IDC expansion port is intended for use with the GSM/GPRS unit and the Ethernet unit, but it is possible to add other peripherals, using SPI, I2C, UART or GPIO. The pinout can be found here.
For this blog post, we're going to use the 3 SPI pins as labeled on the port: MOSI, MISO and SCLK. We need to additional GPIO pins for CE and CSN on the radio. We will leave its IRQ pin unconnected.
The radio works on 3.3V, so we have to use a voltage regulator to bring the port's 5V down. I used a common module based on the AMS1117. The 5V on the port has about 350mA available, that's more than enough for the radio.
CONNECTIONS
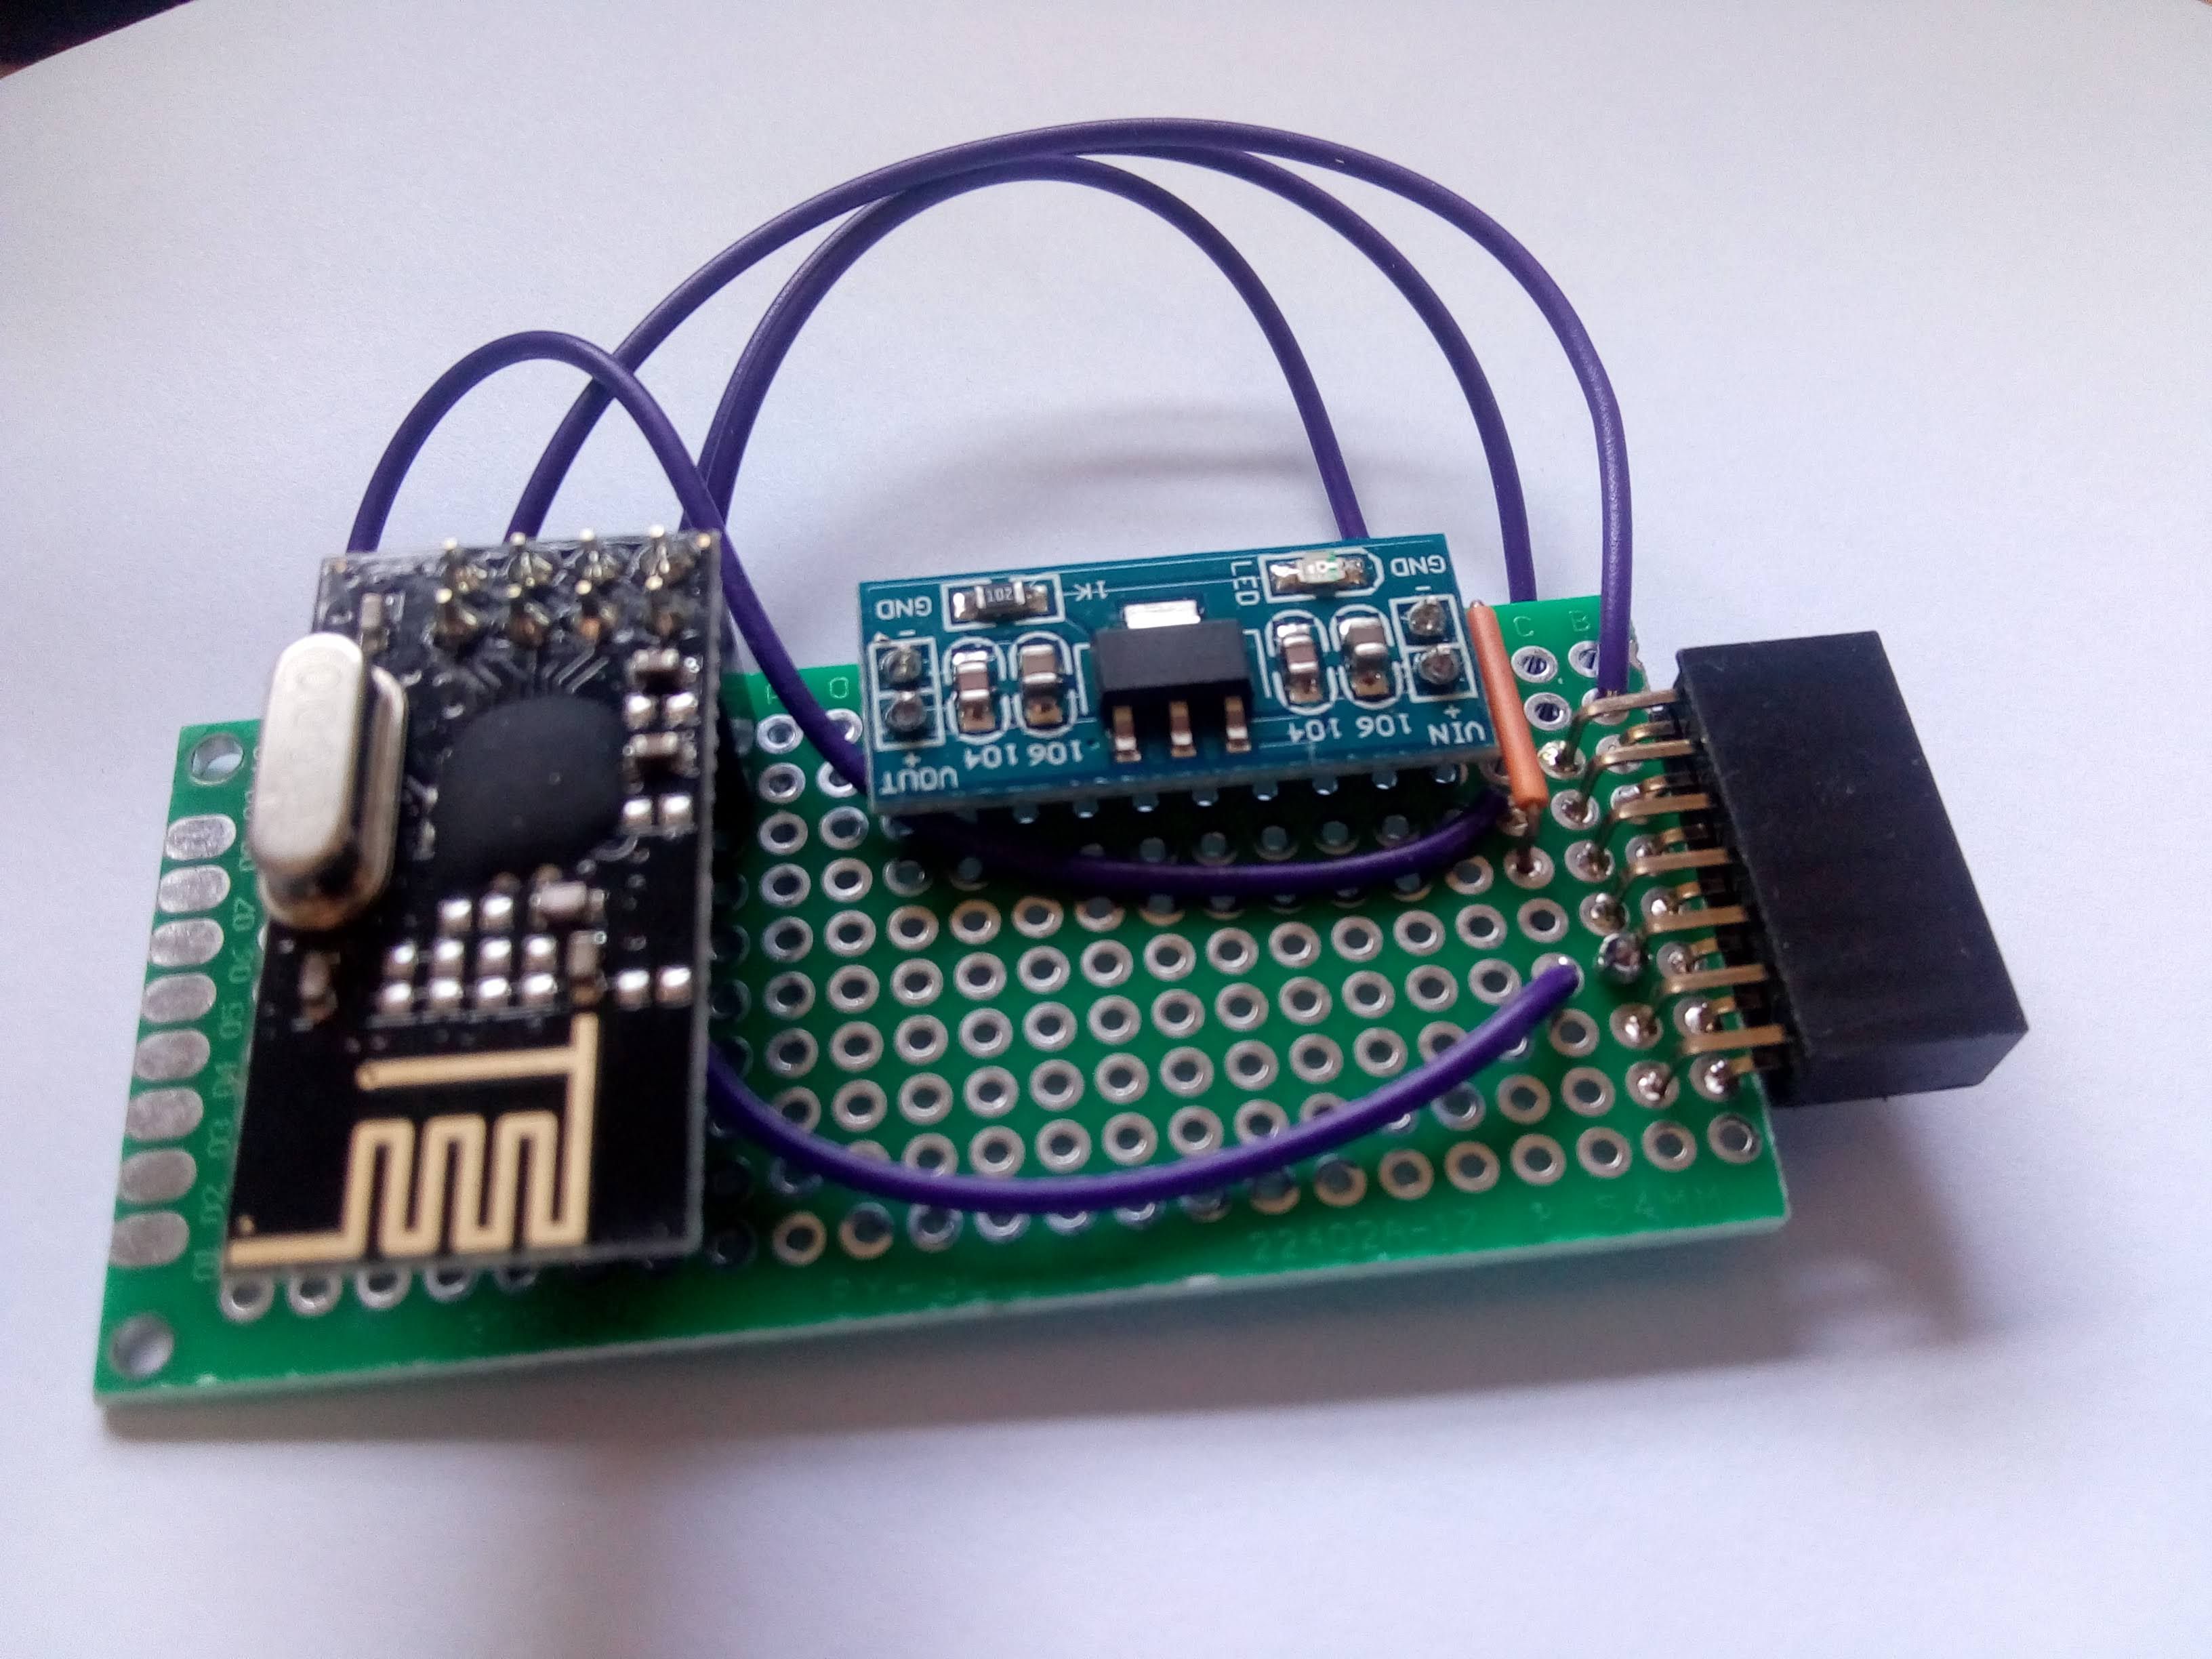
The hardware connections are very simple. I used a perf board with a 90 degree IDC connector, and a few wires:
- 5V to the voltage regulator
- GND to the voltage regulator
- MOSI to radio MOSI
- MISO to radio MISO
- SCLK to radio SCLK
- D7 to radio CE
- D6 to radio CSN
- GND to radio
- output of the voltage regulator to radio 3.3V
LIBRARY
We will use this RF24 library that is popular for Arduino. It does not need any modifications to work on Industruino up to version 1.3.5 but the latest version seems to have a problem compiling, so i suggest installing version 1.3.5 via the Arduino IDE library manager.
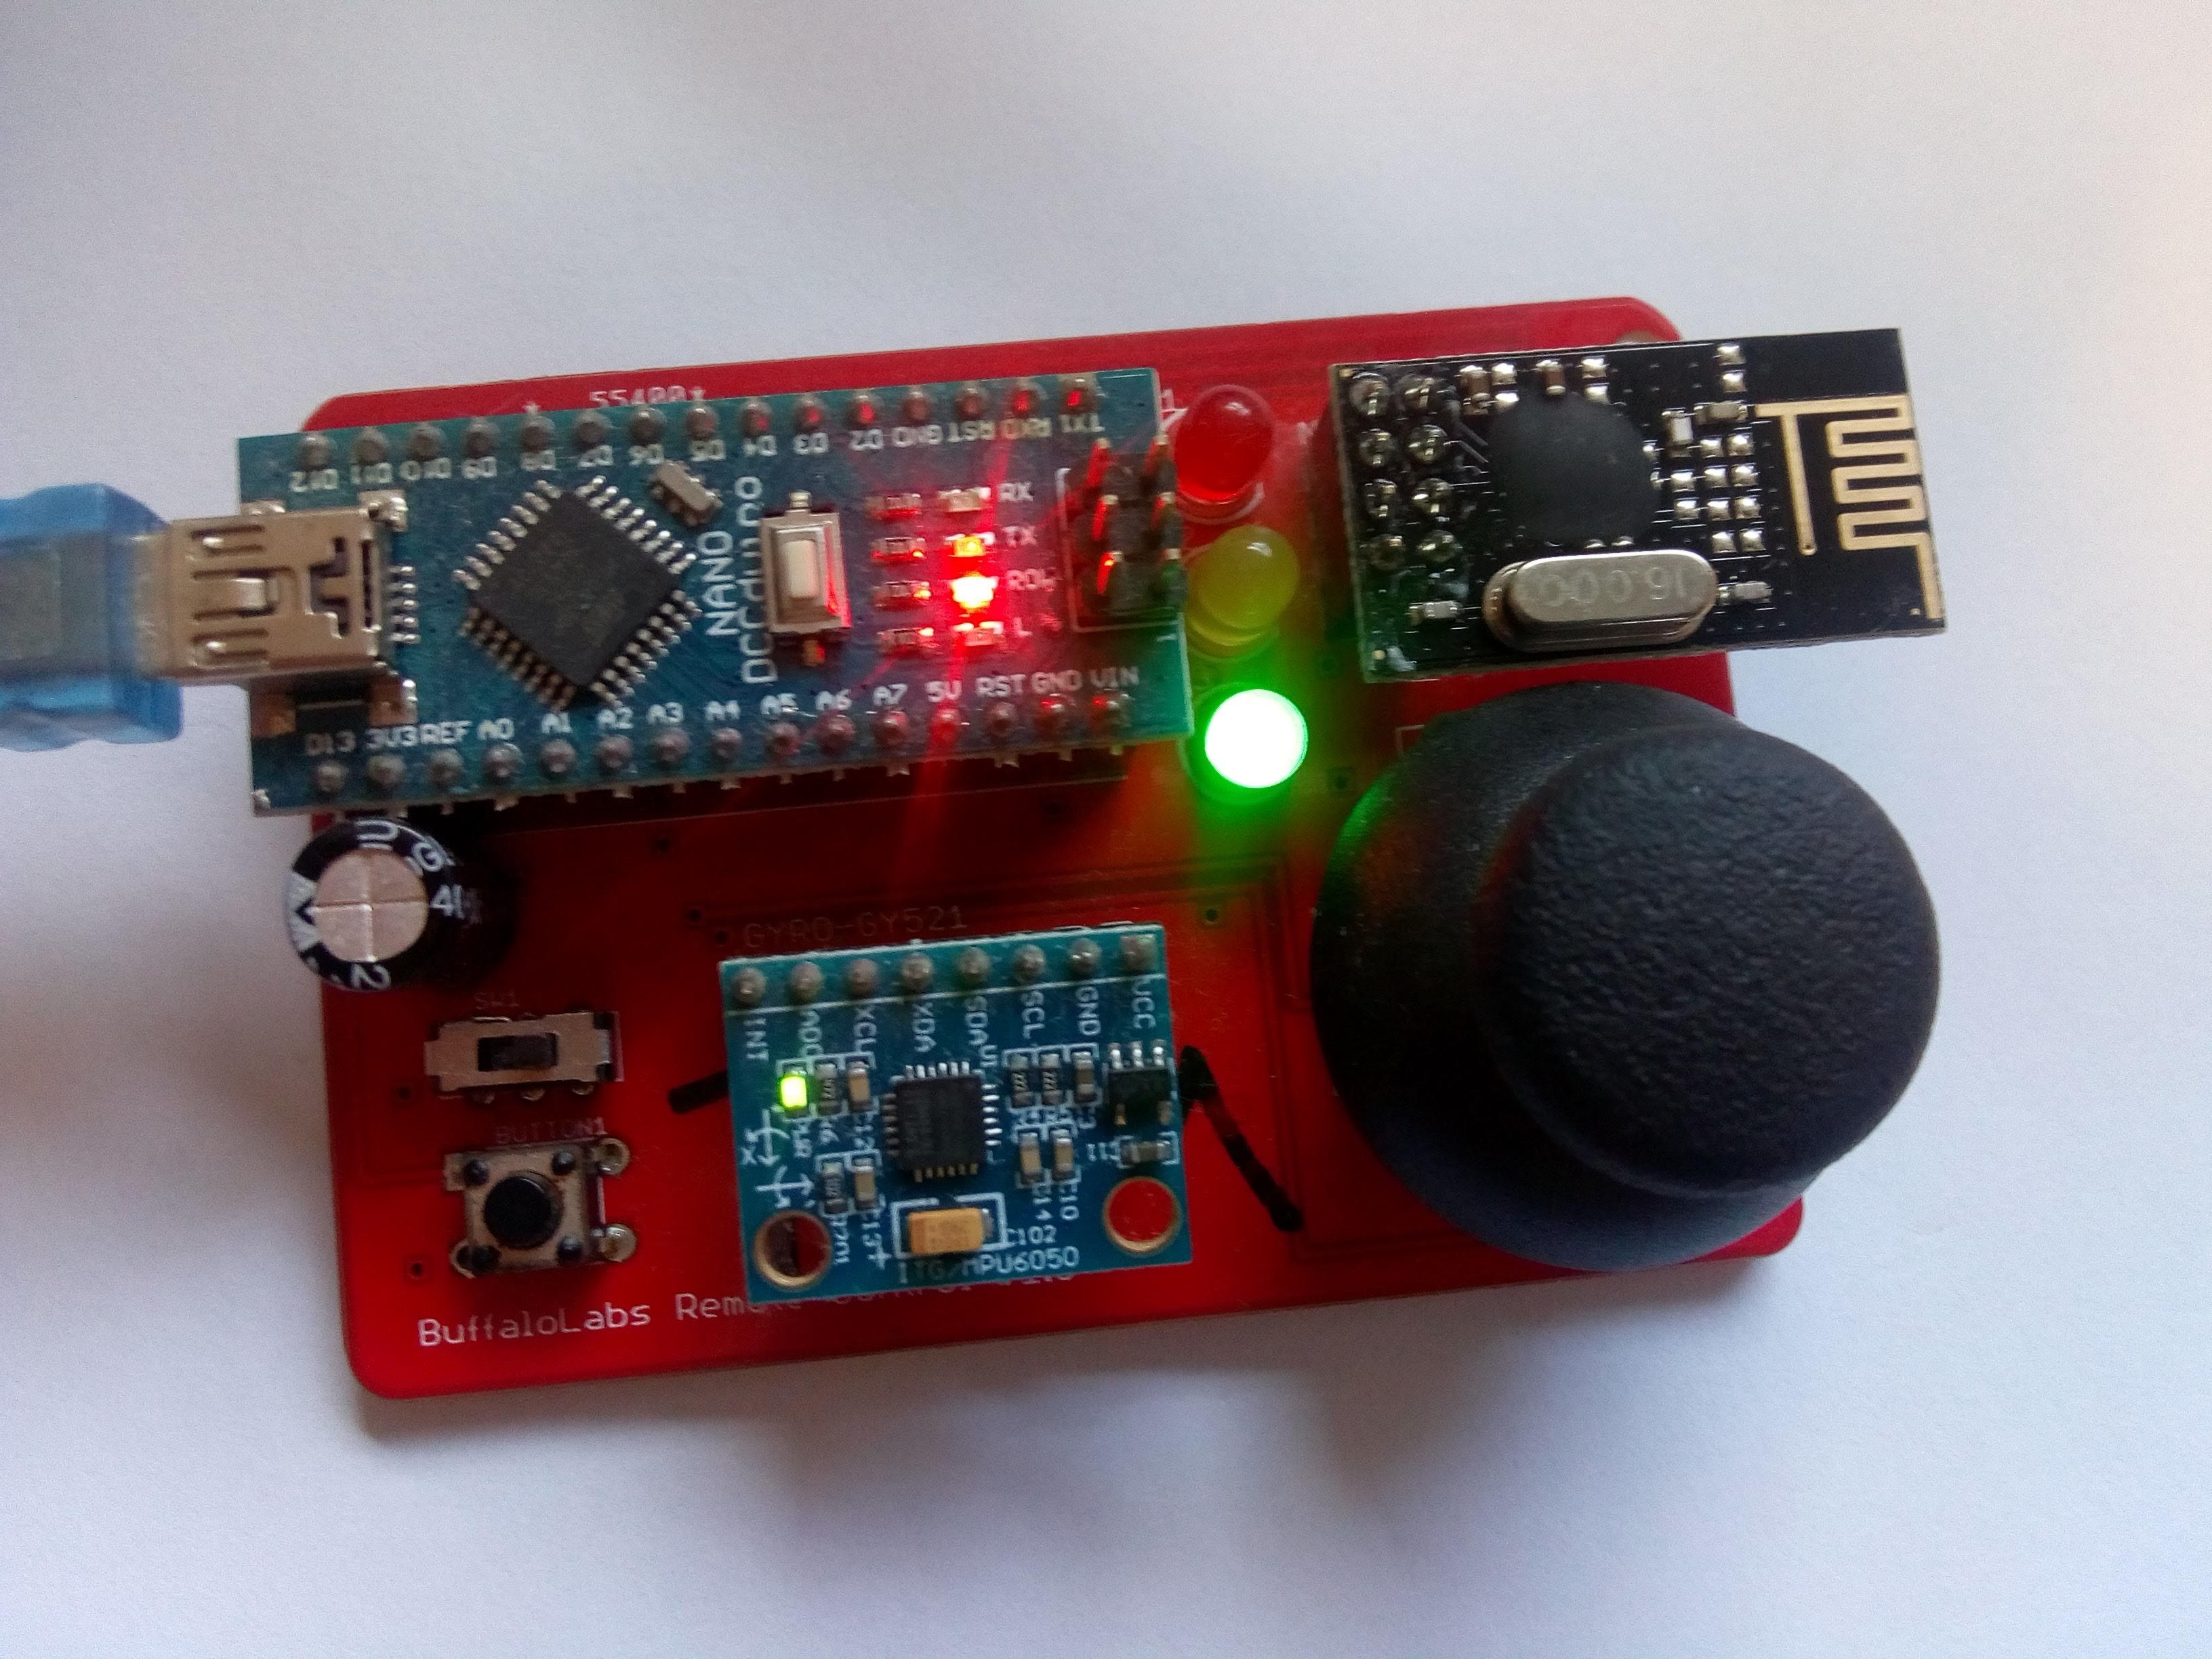
The Industruino will be the receiver in this example. For the transmitter, i am using a remote control that i designed some years ago for a robot, based on an Arduino Nano, with the same nRF24L01 module. Shown in the picture on the left.
This device constantly sends a package with a payload of 8 integers, including the x and y of the joystick, and the button status.
The Industruino acts as a receiver and needs to initialise its radio with the same:
- channel
- data rate
- CRC length
- pipe
Below is the sketch for the Industruino (tested on IND.I/O D21G and should work on PROTO too)
It configures the radio with the same parameters as used on the transmitter, opens a listening pipe, and goes into the loop.
Whenever a radio package is available, it reads the payload into an array of 8 values, as the transmitter is sending 16bit integer values. The index 2 is the x value of the joystick, and 3 the y values, both mapped to a -100 to 100 range. The LCD shows both values, and prints an 'x' along a horizontal axis according to the x value. A button press switches off the backlight.
The transmitter has a very similar program, but instead of listening, it has radio.openWritingPipe(pipe); and radio.write(payload, sizeof(payload));
/*  nRF24L01 transceiver on Industruino IDC expansion port

    RF24 library https://github.com/nRF24/RF24
    cannot compile latest version 1.3.8+, go back to 1.3.5
    RF24 pins:     SPI MOSI,MISO,SCLK plus D6, D7
    can't get printf to work

    Tom Tobback, Feb 2021
*/

#include <UC1701.h>
static UC1701 lcd;

#include <SPI.h>
#include <RF24.h>

#define CE_PIN 7
#define CSN_PIN 6

uint64_t pipe;
int prev_x;

RF24 radio(CE_PIN, CSN_PIN);

///////////////////////////////////////////////////////////////////////////////////////////////////////

void setup() {

  pinMode(26, OUTPUT);     // backlight on D21G
  digitalWrite(26, HIGH);

  lcd.begin();
  lcd.clear();
  lcd.setCursor(0, 0);
  lcd.print("Industruino nRF24");

  SerialUSB.begin(115200);
  delay(1000);

  SerialUSB.println("nRF24L01 receiver demo starting");
  if (!radio.begin()) {
    SerialUSB.println("begin failed");
  }

  /////////// RADIO CONFIG /////////////
  radio.setChannel(1);
  radio.setAutoAck(1);                     // Ensure autoACK is enabled
  radio.setRetries(2, 15);                 // Optionally, increase the delay between retries & # of retries
  radio.setCRCLength(RF24_CRC_8);          // Use 8-bit CRC for performance
  radio.setPALevel(RF24_PA_MAX);
  radio.setDataRate(RF24_1MBPS);
  pipe = 0xE8E8F0F0E1LL;
  //////////////////////////////////////

  radio.openReadingPipe(1, pipe);
  radio.startListening();

  lcd.setCursor(0,2);
  lcd.print("x:");
  lcd.setCursor(0,3);
  lcd.print("y:");

}

///////////////////////////////////////////////////////////////////////////////////////////////////////

void loop() {
  if (radio.available()) {
    while (radio.available())
    {
      int16_t payload[8];
      radio.read(payload, sizeof(payload));
      for (int i = 0; i < 8; i++) {
        SerialUSB.print(payload[i]);
        SerialUSB.print("\t");
      }
      SerialUSB.println();

      // show x,y on LCD
      lcd.setCursor(30,2);
      lcd.print(payload[2]); lcd.print("    ");
      lcd.setCursor(30,3);
      lcd.print(payload[1]); lcd.print("    ");
      // switch off LCD backlight when button pressed
      digitalWrite(26, !payload[7]);

      // moving x on line 5
      lcd.setCursor(prev_x, 5);
      lcd.print(" ");
      prev_x = 64 - payload[2]/2;
      lcd.setCursor(prev_x, 5);
      lcd.print("x");
    }
  }
  else
  {
    SerialUSB.println("No radio available");
  }
  delay(100);
}