In this blog post we show you how to setup your HomeAssistant for use with an Industruino IND.I/O so you can visualise and control your sensor data and actuators connected to your IND.I/O (digital 12/24V, analog 0-10V/4-20mA) via HomeAssistant.
Hardware needed:
- Industruino IND.I/O D21G
- Industruino network module:
- Ethernet module, or
- WiFi module
Content:
- HomeAssistant setup
- Industruino IND.I/O setup
- Sending Industruino Configuration to HomeAssistant
- HomeAssistant Configuration
- Example Automations
HomeAssistant setup
The Industruino will communicate with HomeAssistant (HASS) via the MQTT protocol.It is possible to use a public broker, but we only tested with a local broker as recommended by HASS: the Mosquitto MQTT broker add-on. This is available on the HASS OS, but as far as we understand, not on the Docker installation.
Go to Settings, Add-ons, MQTT mosquitto broker, install, start.
Go to Settings, Devices, Integrations, connect MQTT to HASS.
Make sure ‘MQTT discovery’ is enabled.
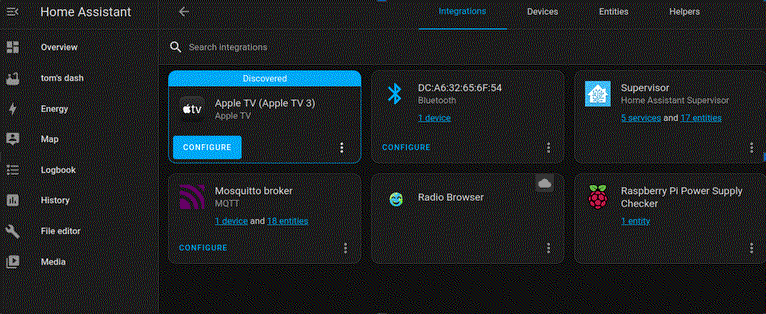
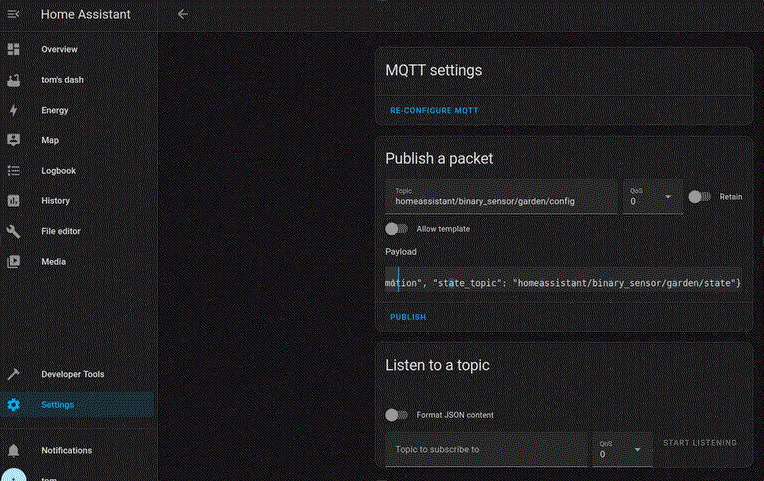
To test your setup, go to Settings, Devices, Integrations, click on MQTT configure
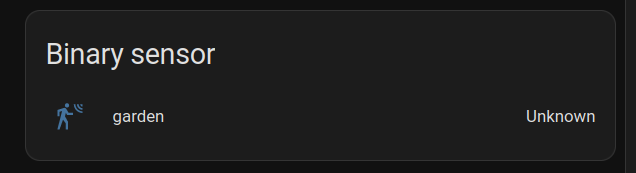
Publish a packet to test MQTT discovery: a binary sensor ‘garden’
In topic, put: homeassistant/binary_sensor/garden/config
In payload, put: {"name": "garden", "device_class": "motion", "state_topic": "homeassistant/binary_sensor/garden/state"}
Click publish.
Go to the Overview dashboard and find a card for Binary sensor ‘garden’
You can get rid of this bogus sensor by publishing an empty payload to the config topic above.
Make sure this MQTT setup is working before you proceed with the Industruino.
Industruino IND.I/O setup
Follow the standard instructions to add Industruino to the Arduino IDE.Find the latest Industruino HomeAssistant firmware, and extract the file in your sketchbook folder.
Open the .ino sketch in the Arduino IDE.
Install the needed libraries, listed in the indio-general tab. Note the modifications needed in the standard Ethernet and WiFiNINA libraries.
Find the section ‘USER CHANGE NEEDED’ at the top of the .ino sketch.
If you are using the ETHERNET MODULE:
#define COMM_MODULE 1
In case you do not want to use DHCP, go to the indio-eth.h tab and set USE_DHCP to 0, and edit the static IP address.
If you are using the WIFI MODULE:
#define COMM_MODULE 0
Go to the indio-wifi.h tab and edit your wifi network SSID and password.
Note: MQTT over SSL not tested yet
Compile the sketch, and if successful, upload over USB to your Industruino.
Check the Serial Monitor for troubleshooting information.
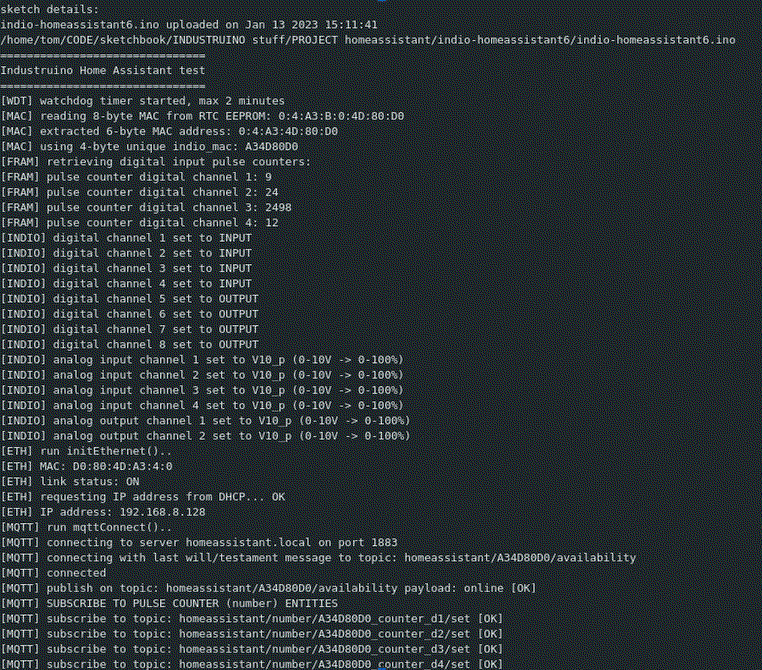
Intro with firmware details
Network connection (Ethernet or WiFi)
MQTT connection
Then it goes to the main screen, showing the I/O data, and the device identifier (6-byte MAC).
Now we are ready to send the Industruino configuration details to HASS by MQTT discovery.
Send Industruino configuration to HomeAssistant
From the main data screen, press the UP button, you will see the CONFIG PUBLISH screen.Hold the UP button, and also press the DOWN button to start the publish.
This takes about 20 seconds, and returns to the main data screen.
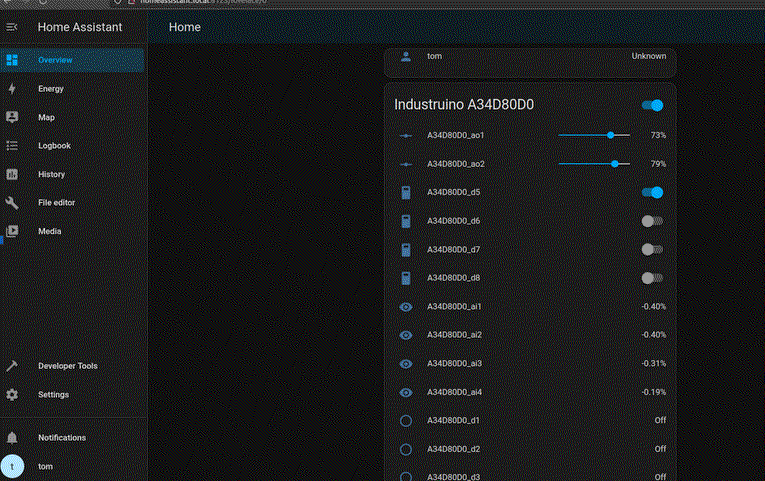
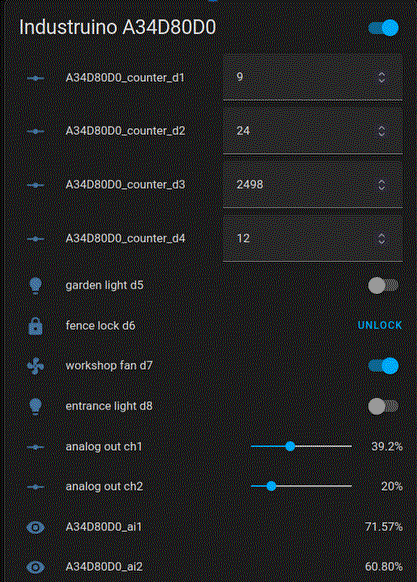
Now go to the HASS Overview dashboard, and it should show the Industruino device with its MAC identifier, and all the entities created under the device. The entities are named with the MAC identifier, underscore, and I/O channel identifier:
HomeAssistant configuration
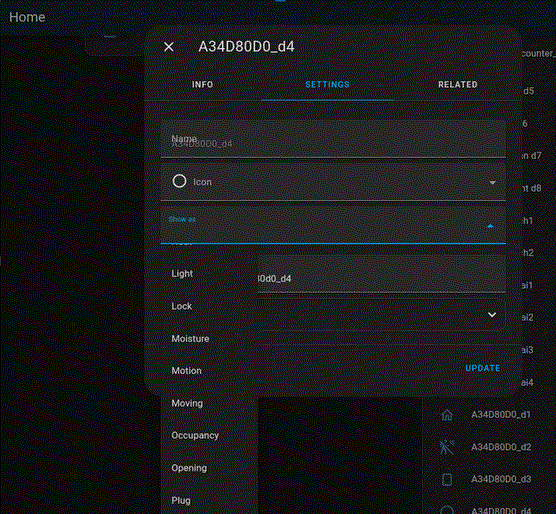
The types and icons of the binary_sensor and switch entities can be changed by clicking on them.
You can also configure the entities via Settings, Devices, Entities.
Example configuration
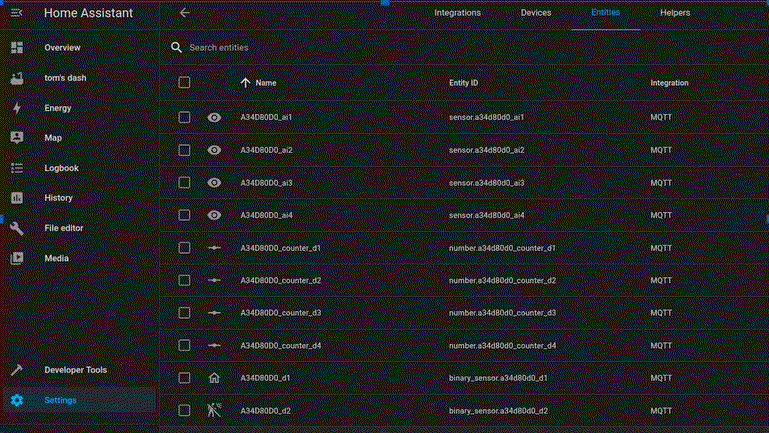
You can also configure the entities via Settings, Devices, Entities.
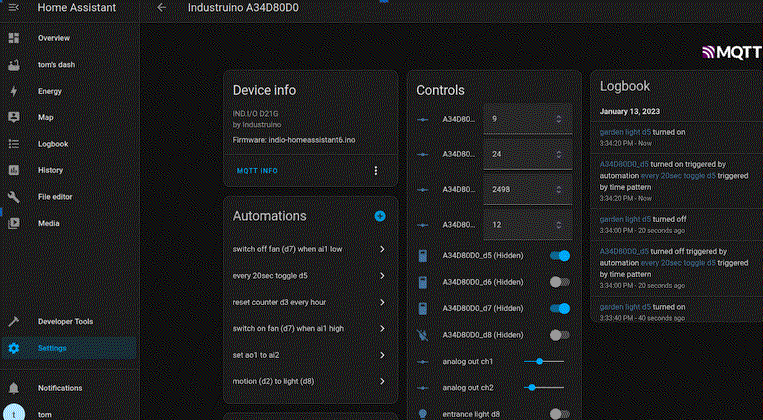
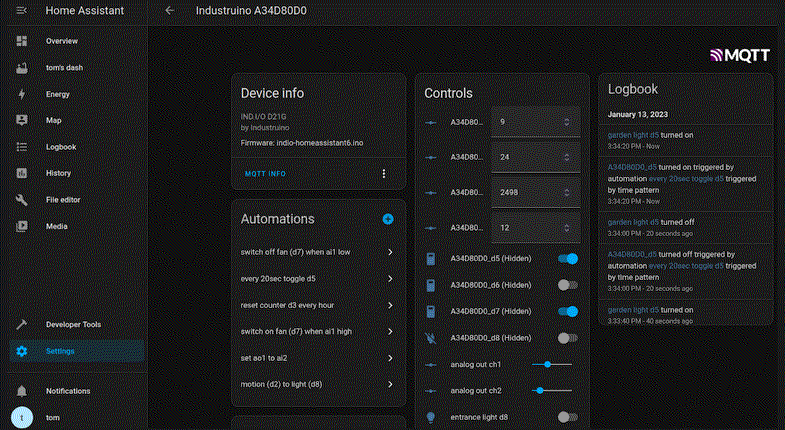
There is also a useful device overview in Settings, Devices where all the related info is shown, including automations.
The Industruino will publish all state changes of the digital inputs, and publish any changed pulse counters at a minimum interval defined in the firmware as PULSE_COUNTER_PUB_INTERVAL_SEC.
Analog input values are also only published when changed, with a minium interval defined in the firmware as ANALOG_READ_INTERVAL_SEC.
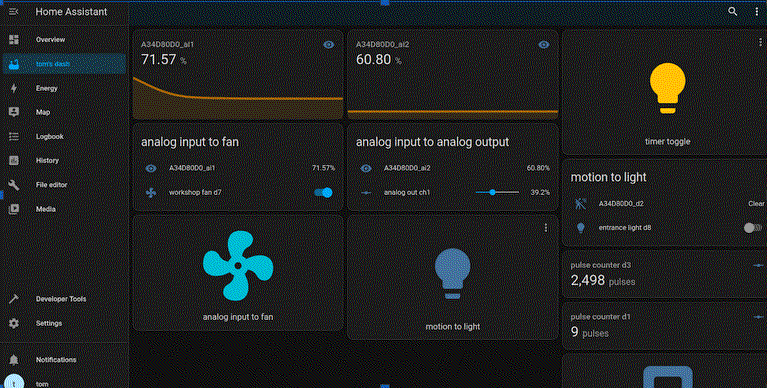
It is also possible to create customised dashboards.
Example automations
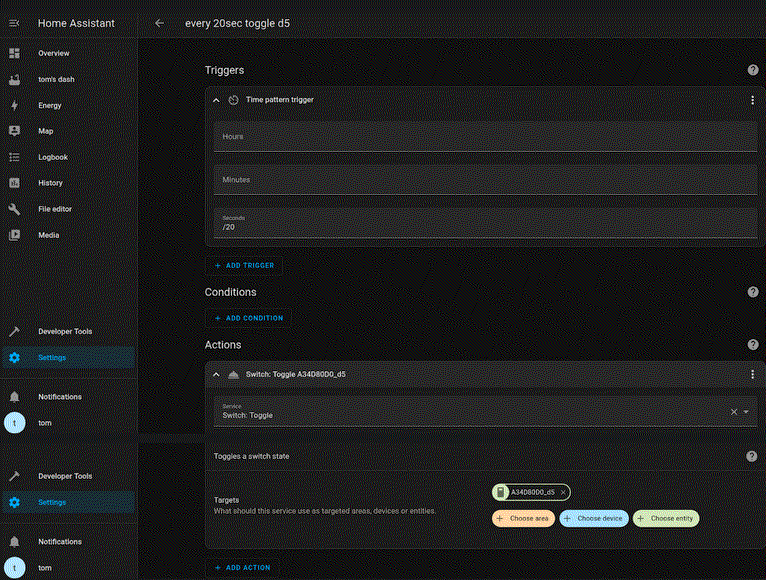
Automations are a standard feature of HASS so much more information is available as HomeAssistant documentation. Below we show a few simple automations created via the HASS UI.Go to Settings, Automations&Scenes
1. Create a new automation which will toggle digital output CH5 every 20 seconds.
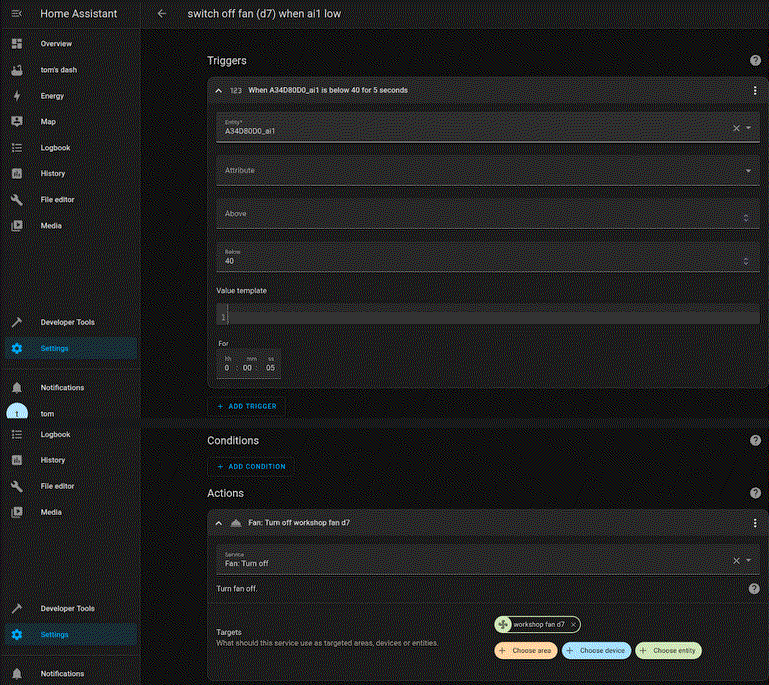
2. Create an automation that will switch off digital output CH7 when analog input CH1 is below 40% for 5 seconds.
Of course you can add any other devices linked to HASS to your automations.